


The Ansible Ad-Hoc command gives you more advantage for exploring ansible itself. You are able to perform tasks without creating a playbook first, such as checking your remote server memory, disk spaces, managing services, editing the line configuration, copy a file to only one host, install only one package. Here I am going to demonstrate how to run ansible ad-hoc commands on your docker containers, instead of a remote virtual machines, Containers and virtual machines have similar resource isolation and allocation benefits, but function differently because containers virtualize the operating system instead of the hardware.
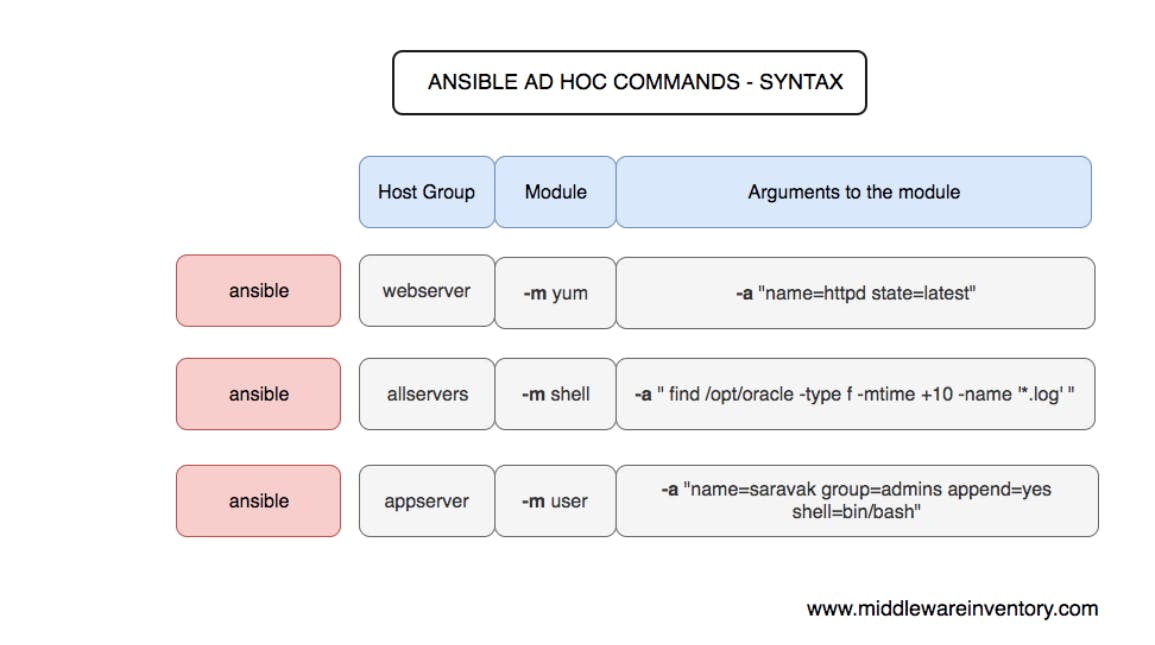
What are ad-hoc Commands
Ansible ad-hoc commands, are commands that are written to perform a particular task; For example to;
- Just validate the uptime of remote servers
- get the amount of memory and disk space of remote hosts servers
- Ping and validate if the server is alive and responds
- Install packages on remote servers
Prerequisite
- To do the exercise, I will be using be creating a virtual machine on GCP, you can create a virtual machine on any cloud platform or use Linux machine.
- Install Docker on the VM, Click here
- Install Ansible on the VM Click here
Build and Run the Docker Container
To run the docker container, lets first create a docker image from a Dockerfile that allow SSH access;
- In your terminal, create a Dockerfile
$ touch Dockerfile
$ nano Dockerfile
- Paste the code below in the file and save
FROM       ubuntu:18.04
MAINTAINER Abdulhadi Ahmad

RUN apt-get update

RUN apt-get install -y openssh-server
RUN mkdir /var/run/sshd

RUN echo 'root:root' |chpasswd

RUN sed -ri 's/^#?PermitRootLogin\s+.*/PermitRootLogin yes/' /etc/ssh/sshd_config
RUN sed -ri 's/UsePAM yes/#UsePAM yes/g' /etc/ssh/sshd_config

RUN mkdir /root/.ssh && touch authorized_keys /root/.ssh/
RUN apt-get clean && \
    rm -rf /var/lib/apt/lists/* /tmp/* /var/tmp/*
# Volume Configuration
VOLUME ["/root/.ssh"]

EXPOSE 22

CMD    ["/usr/sbin/sshd", "-D"]
This image is going be base off ubuntu and will have openssh server installed
- Next we build the image
docker build -t myssh .
you can replace myssh to your preferred image name, the period (.) is to build the image in the current directory and you can declare a path instead.
- After the images is successfully built, lets check to confirm
docker images

Set-Up SSH
Before we run some containers, lets set up SSH connection between our host and the container, we need to add our SSH public key to the containers when running it. I don't recommend creating an image with the public key on it, rather having the file on the host system that has all public keys authorized and mount directory containing authorized_keys on the container when running the container
Let's create a the authorized_keys file in our home directory inside a mykeys directory:
$ mkdir ~/mykeys
$ nano  ~/mykeys/authorized_keys
Then add your public SSH key to the file, you can add as many as you want. Now when starting the container, map this file to /root/.ssh/authorized_keys on the container, to a volume we create.
- Now lets run some containers to manage with ansible, we are going to start three containers to map the authorized_keys we created, we do this with the command;
docker run -d -v ~/mykeys:/root/.ssh --name myssh1 myssh
docker run -d -v ~/mykeys:/root/.ssh --name myssh2 myssh
docker run -d -v ~/mykeys:/root/.ssh --name myssh3 myssh
 see all the created containers

- Get the IP address of each containers you can use the docker inspect command to get the IP address, but you have to go through the large output to locate the IP address, we will use the command to get the IP address of each container;
docker inspect -f '{{range .NetworkSettings.Networks}}{{.IPAddress}}{{end}}' myssh1
 you replace the name of the container with your container name or ID, repeat the command for the other containers to get their IP address. make a note of the IP addresses we will be needing them very soon.
Going Back to Ansible
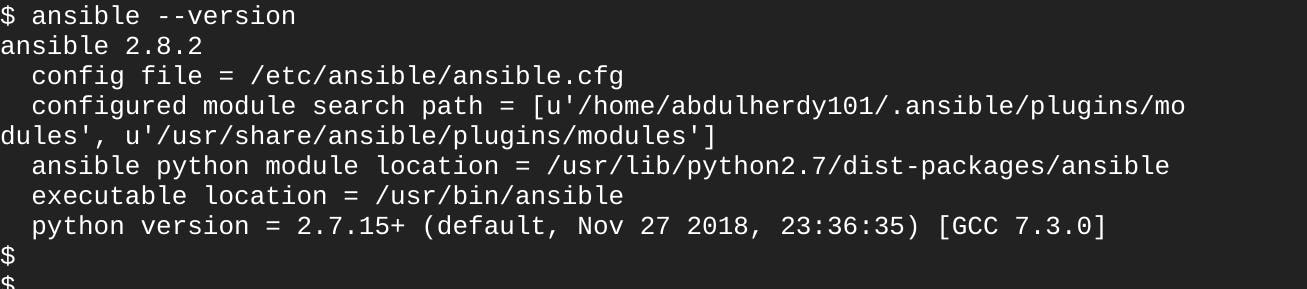
Since ansible is installed, lets make sure it’s working properly by entering;
ansible --version
on the command line. You should see the currently-installed version:
Creating an Inventory File
Ansible uses an inventory file which is file that contain list of servers either identified by their IP address or domain name. Ansible inventory file matches servers (IP addresses or domain names) to groups. Inventory files can do a lot more, but for now, we’ll just create a simple file with three servers (our docker containers) and add them to the group docker. A default inventory file is created at /etc/ansible/hosts, if the hosts file is not present Create a file at /etc/ansible/hosts which is the default location for ansible. Use the command to create the inventory file, if does not already exist.
$ sudo touch /etc/ansible/hosts
Edit this hosts file with nano, vim, or whatever editor you’d like, but note you’ll need
to edit it with sudo as root. create a group for your IP address; here we named the group docker, as shown below, replace the IP addresses with your containers IP addresses gotten earlier,
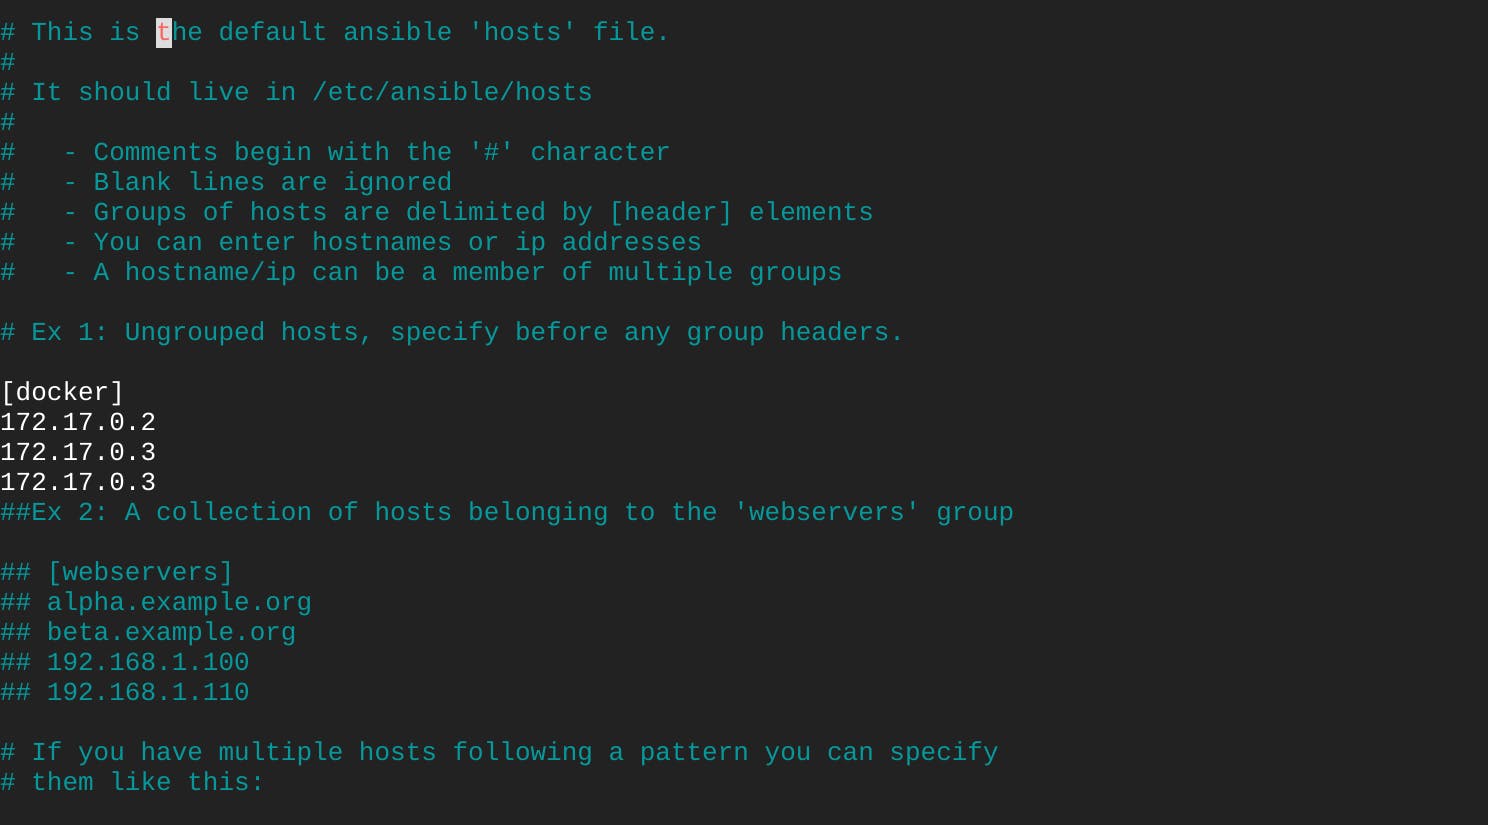
save and exit the text editor
Running your first ansible ad-hoc command
Now that ansible is installed and we've also created an inventory file, it’s time to run a command to see if everything works! Enter the following in the terminal which is a simple ping command to see if there is connection between our host machine and the docker container. We are going to run two commands here, the first command is to add the container to our known_host, accept the authentication by answering yes, after each IP address. (you might see an error, but don't worry just accept, by typing yes, to add the IP to our known host).
$ ansible docker -m ping -u root
the next command to make the ssh connection, since our container is password protected, the password is root as defined in our Dockerfile above
$ ansible docker -m ping -u root -k
if you get an error that the ECDSA fingerprint has changed
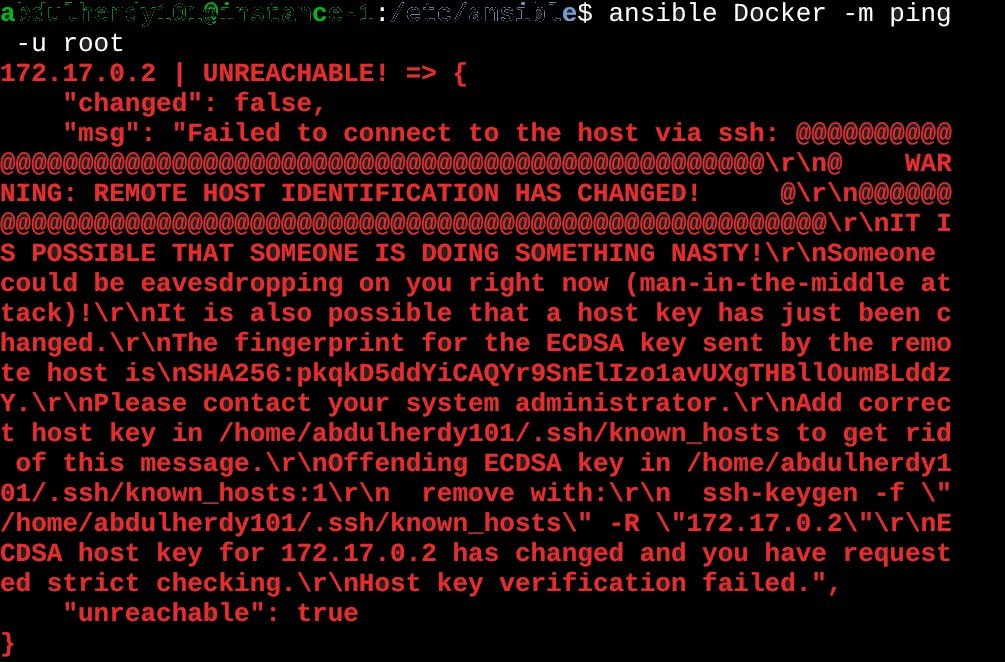
we need to remove the former ECDSA fingerprint of the IP from the known_host. with the command below;
ssh-keygen -R 172.17.0.2
replace the IP address with IP address that is giving the error.
Run the previous two commands again.
If everything worked, you should see a message that shown below

Now lets run more ad-hoc command
Conatainer's hostname
Here we want to return the hostname of all the containers in group docker of our inventory file
ansible docker -a "hostname" -u root -k
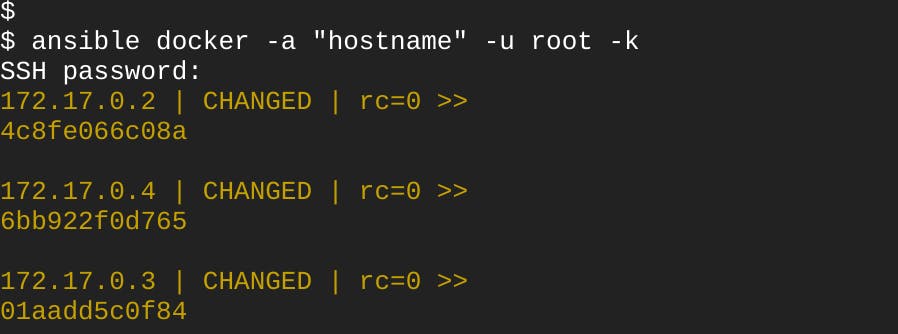 as shown it return the containers ID's as the hostname of the containers
Conatainer's disk spaces
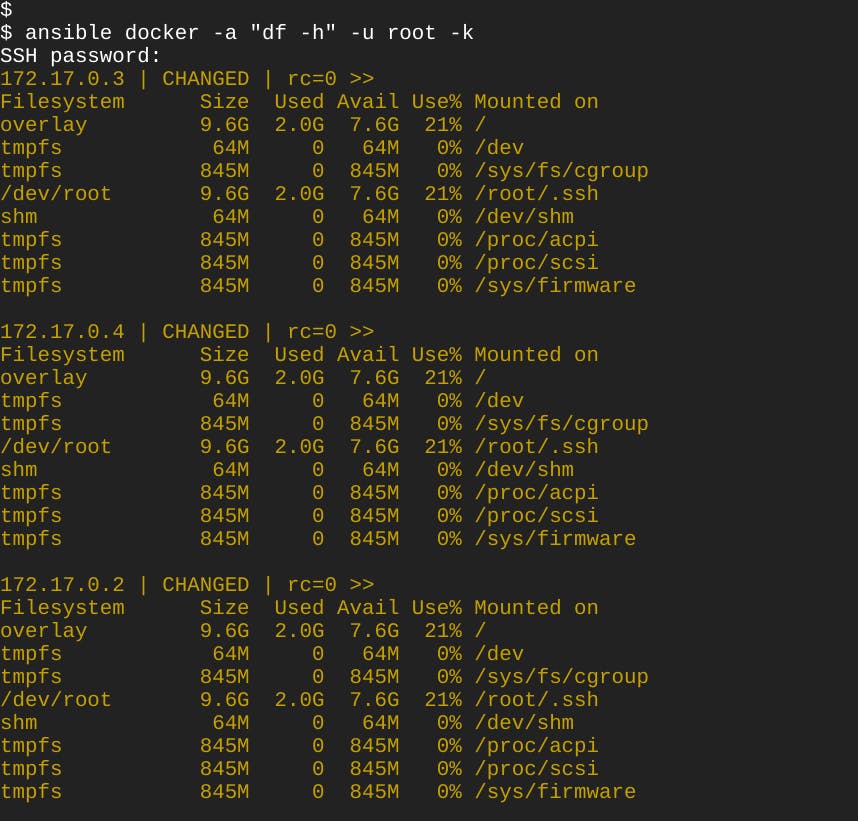
The next ad-hoc command we will look at now is to returns the disk information's of our containers.
$ ansible docker -a "df -h" -u root -k
Checking Dates
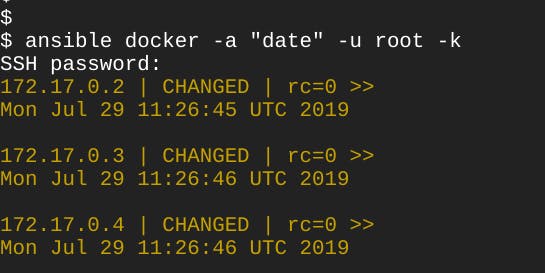
The next command is to check the dates on our containers
$ ansible docker -a "dates" -u root -k
Summary
In this write-up, you learned how to build a docker container using a Dockerfile to build images that was used to run containers for testing on your local workstation you configured, monitored, and managed the infrastructure (containers) without ever logging in to an individual server. You also learned how ansible connects to remote servers, and how to use the ansible command to perform tasks on many servers quickly in parallel.
To try out more ansible ad-hocs commands and more indepth information on ansible commands check the ansible official documentation
The docker image used here can be pulled from dockerhub "docker pull abdulhadi101/ubuntu-ssh"